
SAVE THE DATE – IPPE 2023 – Atlanta
We invite you to the IPPE tradeshow from January 24…

Broilers

Turkey breeders

Broiler breeders

Layers
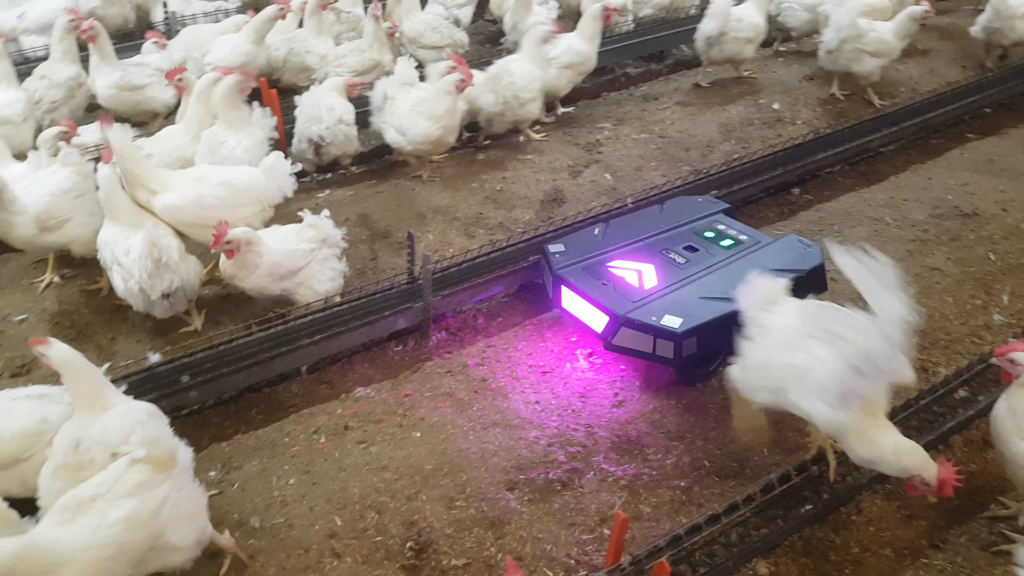
Reducing the percentage of floor eggs, saving time, improving animal behavior, better mating: Getting a poultry robot to move your birds has many advantages. But are you still unsure whether your building is suitable for such equipment? Or how to start the machine? The Tibot team will answer your questions by sharing the experience of a farmer who raises breeding hens.
However you’re running the farm, the robot circulates randomly, making its rounds all by itself. Each farm building has its own unique features, the robot is fully designed to have no trouble getting around.
The poultry robot is designed to work on a total area of between 700 and 1000 m². You can therefore assume that one robot is sufficient to move around your entire building, even if you have a central nest and two scratching zones. With a set-up like this, the robot is used by alternating two or three days on each side. On the other hand, it is recommended to have two robots if you have four scratching zones. It is also better to have multiple robots if you have multiple buildings, to reduce disinfection time and ensure that the robot spends enough time near the hens.
As far as height and width are concerned, the poultry robot is compact: 63 cm long, 58 cm wide and 19 cm high. In practice, it only needs 20 cm of height to go under flat chain feeders and a distance of 80 cm between the wall/line or the slats/line. The robot can also pass over the scrapers by a height of 5 to 6 cm.
A poultry robot must be able to adapt to your habits, not the other way around! The type of litter is not important; the robot can run on shavings, sawdust or chopped straw, with the option to change the wheels. This makes it possible to adjust the robot’s ground clearance, either to adapt to bumps or to make it possible to pass under a slightly low feeder chain.
The robot is equipped with a front bumper so that shocks are not a problem. You can also add an adjustable flap to detect obstacles smaller than 10 cm, or to prevent the robot from climbing up a slatted access ramp, or even side bumpers to avoid any chance of it getting caught on columns holding up the coop or a chain feeder, for example.
Finally, there are tips for minimizing floor eggs in a specific area. If you have a problem in a corner for example, you can add an obstacle like a weighted bucket. The robot will maneuver around the bucket and automatically spend more time in that area. When a coop has multiple sections, a good solution for the robot to pass through them without the risk of a bird going through with it is to install thick tarpaulins under the wire mesh of the different sections to create a “cat flap”.
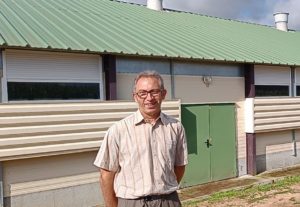
As you will have understood, the poultry robot has been designed to adapt to any type of building. For barns with liftable feed chains, things are very simple: once the chains have been lifted, the robot has free rein to move around with few obstacles. For farms where the equipment is fixed to the ground by feet, it is sometimes necessary to make some small and easy adjustments. This was the case for Clément Gélineau, a farmer of dwarf breeding hens in La Poitvinière (France), who has a see-through building with a central nest, two hard floors and three lengths of feed and water chains:
“What worried me at first was the height of the robot. I have feeder chains, with plastic feet. My chickens are not very big and it is a breed that has trouble eating. So I can’t lift the chains, but that’s not a problem, the robot fits under. For the width, I had a chain that was 20 inches (50 cm) from the slats. So I just moved it to 40 (1m), 48 inches (1m20).”
What happens once you receive your poultry robot? Start-up is a snap, without any complicated procedure to follow. As for introducing it to the farm, some best practices should be observed to ensure that the birds react well.
Many farmers have misconceptions about poultry robots and believe, for example, that the technology must be difficult to get started with. However, the opposite is true! To use the robot developed by Tibot, there is no installation required; the robot can be used as soon as it comes out of the box, by pressing an “ON/OFF” button. It comes with a battery that lasts for 10 hours, rechargeable from a wall outlet, as well as a controller to customize its use. As Clément Gélineau explains, getting started is a breeze:
“When I got the robot, someone from Tibot came for the whole morning. It’s really easy to learn: it’s exactly like a remote control car! The controller with all the feature is simple, and it’s easy to program the robot. It can be recharged overnight and set to automatic mode in the henhouse in the evening, so that it goes off by itself in the morning.”
Are you wondering how your birds will behave in front of a poultry robot? Even though it’s been designed to improve their health and well-being, it is likely that your chickens will be frightened at first. To start smoothly, it’s best to start the robot without sound or light for the first time, selecting the lowest speed. Ideally, you should walk behind the robot with the remote control and stop it as soon as the birds gather at the back of the building, giving them time to make their way past. It’s advisable to make two or three trips back and forth so that they gradually get used to it.
Once the birds have discovered the robot, you can increase the speed from day one, but still without sound or light. Usage should be timed to coincide with laying hours, including during feeding if your hens are laying eggs on the floor during this period. Once your chickens are past the curiosity stage, they may get used to it and move less. You can then use the settings at your disposal (different sounds and lights, fast acceleration, waving flag kits) to get around this.
To have an impact on fertility, you should use the robot every afternoon from 44 weeks (3 hours before lights-out). If you have two floors, you can alternate the robot every other day.
While the poultry robot is very useful, one thing is certain: It will never replace the knowledge you have of your animals. Each flock is different, and observing your birds is what will allow you to get the most from the robot, as Clément Gélineau explains:
“There is a protocol to follow, but you have to watch your chickens. On the robot, there are different modes so that the hens don’t get used to it and it works well. We can change the light, the sound, the speed, the steering… On the first flock on which I tested the robot, I changed something every two or three days; as soon as I noticed that floor eggs were starting to rise again, I changed the robot’s mode. I also changed my schedule, from 6 to 8 o’clock… I saw that I shouldn’t always do the same thing so that the chickens wouldn’t form bad habits. Since I have two floors, I used to put the robot on one side of the building for two days, then on the other side for two days.”
Whatever the configuration of your building, you’re sure to be able to easily incorporate a poultry robot into your farm. It’s simple and you stay in control to adapt your use to the flock.
We invite you to the IPPE tradeshow from January 24…

We are proud to announce our partnership with the Australian…

THE TIBOT ROBOTICS ACTIVITY CONTINUES THROUGH OCTOPUS BIOSAFETY Auray, November…

We are delighted to announce our new distribution partnership with…

Octopus Biosafety will participate in the 𝗜𝗡𝗗𝗔𝗚𝗥𝗔 tradeshow from October…